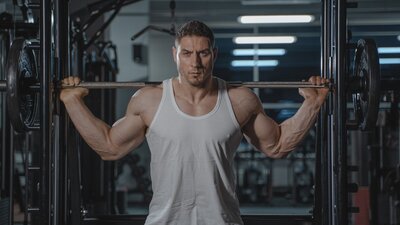
In this short article, we will learn the techniques and cues to help you master the squat. The squat is a diverse, knee-dominant movement pattern (for example: barbell squats, split squats, etc) that has its place in any program. This exercise is exceptional at building postural stability, hip and knee extensor strength, and hypertrophy.
Squatting may seem simple, but there are valuable techniques that can carry over into the rest of your training program. While there are many squat variations, this article will focus on techniques that will hold true regardless of the variation.
Let’s analyze how implementing these techniques will make your squat more confident and improve your whole body through stability and overall body awareness.
Set-Up
Setting up the stance, specifically the feet, is crucial. Most beginner to intermediate lifters often neglect to engage and stabilize their feet in the squat, resulting in the lift's pronation and instability. You wouldn’t want to drive a car with loose wheels; the same goes for the squat.
Stance
To begin, find a comfortable stance through the squat’s complete range of motion. You may want to experiment with variations in the width and rotation of the feet to find what feels right. The ideal squat stance allows for stable feet and unrestricted mobility in the hips through a full range of motion.
Research shows that different stance variations elicit different responses in the body, such as a wider stance with a low-bar back squat or more knee flexion with narrower stances (6). However, more research must be done to further establish the effects of stance variations (4).
Tension
With a comfortable stance, you are nearly ready to begin the descent. However, before moving, it is important to create tension in the whole body, from the feet to the shoulders.
“Grab the floor” with your feet to activate the arch muscles
“Create a tripod” with your feet by ensuring three points of contact with the floor: heel, big toe, and outside of the foot near the pinkie toe (3)
The two cues above should have positioned the knees over the feet and removed any caving in. If not, “push the knees out laterally” so they are not pointing inward, or imagine laser pointers coming out of your kneecaps. You want the laser beams to be parallel with one another (5).
From the hips to the shoulders, focus on these techniques to finish creating maximal tension in the body:
Neutral spine
Squeeze the abdominals to lower the ribcage and remove any possible arching in the lower back
Co-contract the pecs and lats to create tension in the upper torso
Descent
With the feet in place and tension generated in the whole body, the descent is ready! The descent is about maintaining tension throughout the lift while moving correctly at the hip and knee joints. To begin the descent:
The hips are the first to move: Hinge the hips slightly backward and then drop the hips down “like an elevator”
As the hips begin to hinge, the knees begin to flex
The torso remains relatively upright compared to hip hinge exercises like the deadlift (1)
Descend as deep as your mobility allows, but not any further as not to lose a neutral spine, do a “butt wink” or have the feet become unstable
While descending, it is crucial not to lose stability in the feet, knees, and spine that this article covered in the tension section of the setup.
Ascent
From a stable bottom position, begin the ascent using the legs and glutes to drive the body back into the standing position. Moving the hips and chest together as one solid unit is the most effective cue to achieve this. Here are some cues to focus on during the ascent:
Hips and chest up together
Drive the knees out (2)
Keep the torso upright
Core tight
Outro
From the initial setup to the subsequent descent and ascent, the importance of stability cannot be overstated. As you implement these principles into your training, focus on the details from the ground up, from your foot activation and placement to the tension in your core.
When using these techniques, lifters will avoid most mistakes, and the weight will move seamlessly. Optimizing stability throughout the movement makes the difference for maximal strength and joint longevity.
Now that your understanding of the squat technique has deepened, squat confidently!
Sources
Glassbrook, Daniel J.1; Brown, Scott R.1; Helms, Eric R.1; Duncan, Scott1; Storey, Adam G.1,2. The High-Bar and Low-Bar Back-Squats: A Biomechanical Analysis. Journal of Strength and Conditioning Research 33():p S1-S18, July 2019. | DOI: 10.1519/JSC.0000000000001836
Lorenzetti S, Ostermann M, Zeidler F, Zimmer P, Jentsch L, List R, Taylor WR, Schellenberg F. How to squat? Effects of various stance widths, foot placement angles and level of experience on knee, hip and trunk motion and loading. BMC Sports Sci Med Rehabil. 2018 Jul 17;10:14. doi: 10.1186/s13102-018-0103-7. Erratum in: BMC Sports Sci Med Rehabil. 2020 Jan 29;12:7. PMID: 30026952; PMCID: PMC6050697.
Nairn BC, Sutherland CA, Drake JD. Motion and Muscle Activity Are Affected by Instability Location During a Squat Exercise. J Strength Cond Res. 2017 Mar;31(3):677-685. doi: 10.1519/JSC.0000000000001745. PMID: 27930445.
Sinclair J, Taylor PJ, Jones B, Butters B, Bentley I, Edmundson CJ. A Multi-Experiment Investigation of the Effects Stance Width on the Biomechanics of the Barbell Squat. Sports (Basel). 2022 Sep 14;10(9):136. doi: 10.3390/sports10090136. PMID: 36136391; PMCID: PMC9503729.
Slater LV, Hart JM. Muscle Activation Patterns During Different Squat Techniques. J Strength Cond Res. 2017 Mar;31(3):667-676. doi: 10.1519/JSC.0000000000001323. PMID: 26808843.
Swinton, Paul A.1; Lloyd, Ray2; Keogh, Justin W. L.3,4; Agouris, Ioannis1; Stewart, Arthur D.5. A Biomechanical Comparison of the Traditional Squat, Powerlifting Squat, and Box Squat. Journal of Strength and Conditioning Research 26(7):p 1805-1816, July 2012. | DOI: 10.1519/JSC.0b013e3182577067

