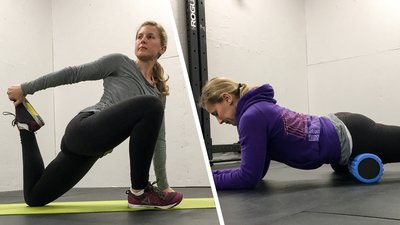
We only have so much time each day, and finding the time to lift or train can be challenging enough. Mobility work? Sure, we know we should do it, but given how many things the experts are shouting at us to work on—hips, ankles, hammies, thoracic spine, shoulders, to name a few—it can quickly get overwhelming.
The answer? Get more efficient and strategic with how you fit mobility into your life. Don't have time for both a yoga class and foam rolling today? Mix the two together in carefully chosen mobility and stretching supersets.
Here's how it works: Foam rolling is essentially self-massage. Post massage, your muscles are more elastic and relaxed, and more ready to accept stretching and yoga-style mobility work. Imagine trying to untangle a necklace or ball of string with brute strength—you'll only make the knot stronger, right? But if you are gentle and slow, the knot will slowly unravel. By foam rolling before you stretch, you're making sure the muscles are relaxed and untangled before you stretch them.
It doesn't matter if you do it in the morning, at night, or with your workout, but I recommend devoting a minimum of 10 minutes a day to this type of work. Even that little bit of time can be enough to produce impressive results if you stick to it consistently.
Here are my favorite pairings. Try them and see what they unlock for you!
1. Foam Roll Calves and Downward Dog With a Calf Stretch
This combination of foam rolling and a foundational yoga pose provides a great starting point to kick off your mobility and flexibility routine.
Foam Roll Calves
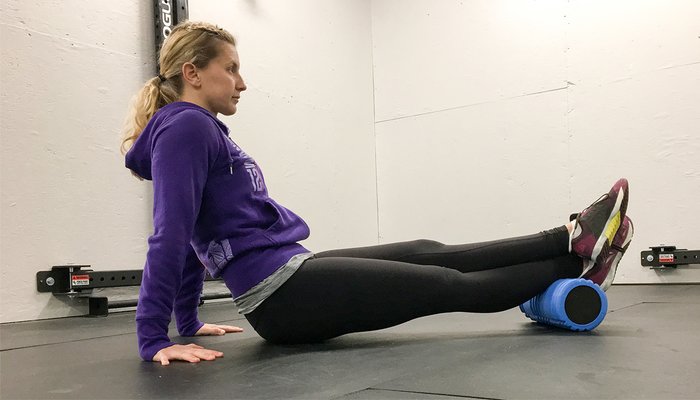
- Place your calf on the foam roller, and cross your opposite ankle on top.
- Place your hands behind you and lift your hips. This will give you the added pressure you need to roll through any knots you feel.
- Shift forward and backward as you massage the meat of the calf muscle down to the Achilles tendon.
- Foam roll for about a minute on each side. When you find a spot that is tender, spend a few extra moments there until you feel the pain subside.
Downward dog With a Calf Stretch
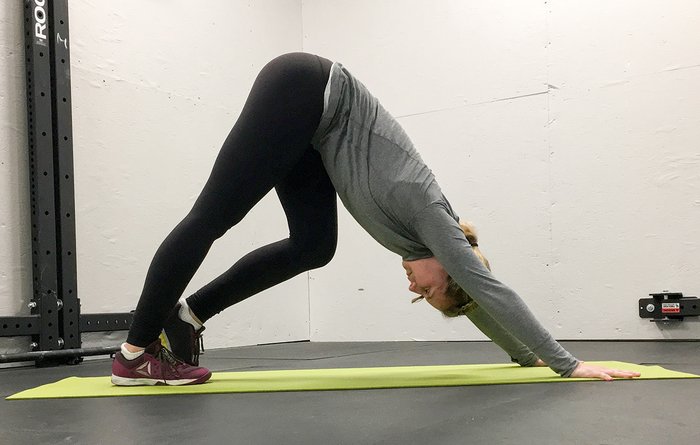
- Start in a plank position with your hands underneath your shoulders and your feet about hip-width apart.
- Send your hips up as you press down through your palms.
- Bend the left knee and drive your right heel down toward the ground as you curl your tailbone up.
- Hold this position for about 30 seconds. Switch sides, and repeat twice.
2. Foam Roll Hamstrings and Half Lift
Foam rolling your hamstrings is as simple as foam rolling your calves, but it does require a lot more movement over the roller. The half lift (also called a good morning) is more involved then downward dog, but with some of the same body position cues.
Foam Roll Hamstrings
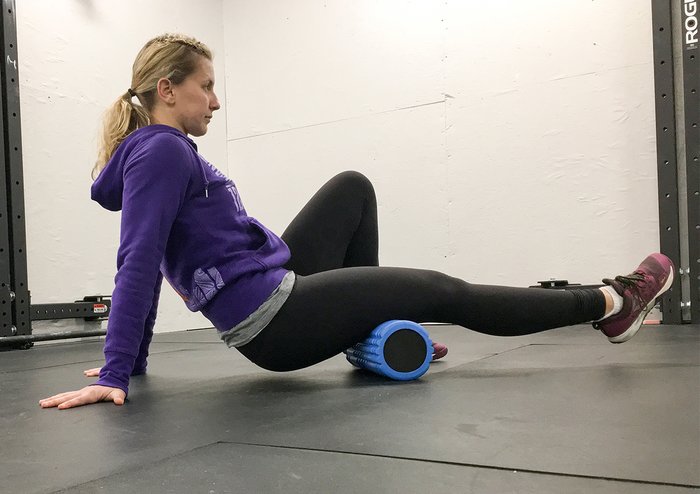
- Focus on both the meat of the hamstrings (located in the middle of your leg) and the insertion point (by the back of the knee).
- Foam roll for about a minute on each leg. Focus your attention on the tender spots. You'll know them when you find them.
Half Lift
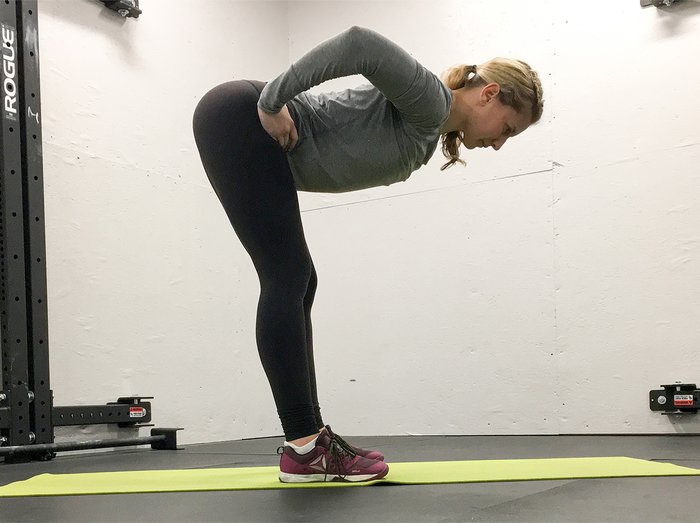
- Stand tall with your feet shoulder-width apart, your toes pointing forward, and your hands on your hips.
- Bend your knees slightly, and bow forward. Keep your back flat and your tailbone reaching behind you.
- Fold only until you feel a stretch in your hamstrings. Hold this position for 10 seconds, then stand. Repeat four more times.
3. Foam Roll Lower Back and Head-to-Knee Forward Bend
Foam rolling your lower back can help alleviate tightness and lower back pain, and the head-to-knee forward bend is the perfect complement to help release tension.
Foam Roll Lower Back
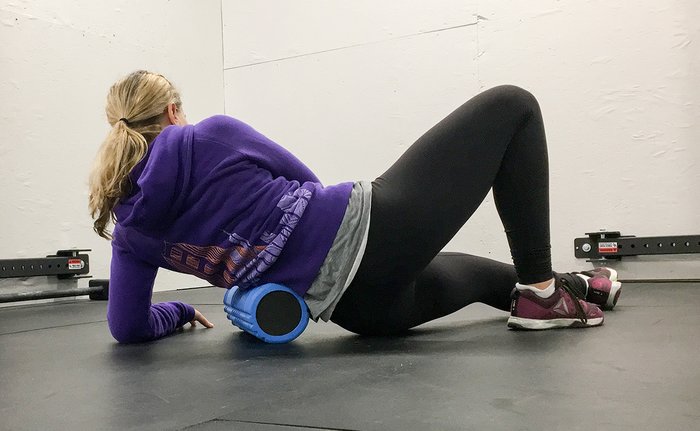
- This works best if you can lean to one side as you roll up and down in the space between the pelvis and ribs.
- Spend about one minute on each side.
Head-To-Knee Forward Bend
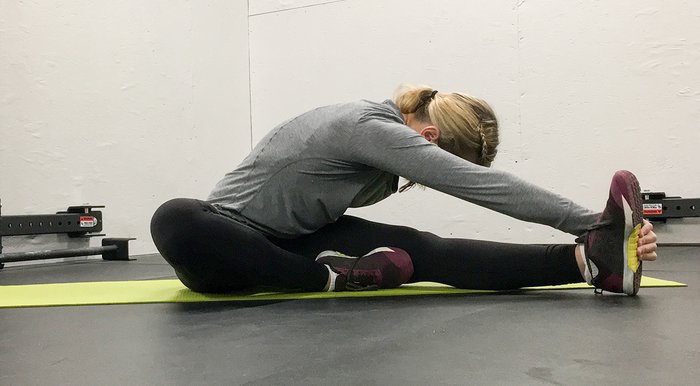
- Sit with your legs extended out in front of you.
- Pull your right foot up to your inner left thigh.
- Sit up tall, reaching your right arm up. Turn your torso to the left, then grab the outside of your lower left leg or ankle.
- Lay your bellybutton over your left thigh. Hold this pose for one minute on each side.
4. Foam Roll Lats and Child's Pose Side Stretch
The lats are often forgotten when it comes to foam rolling, but they're important to include in your routine. If they become too tight, they can lead to shoulder and back pain. The child's pose side stretch is a simple, targeted pose that's accessible to anyone.
Foam Roll Lats
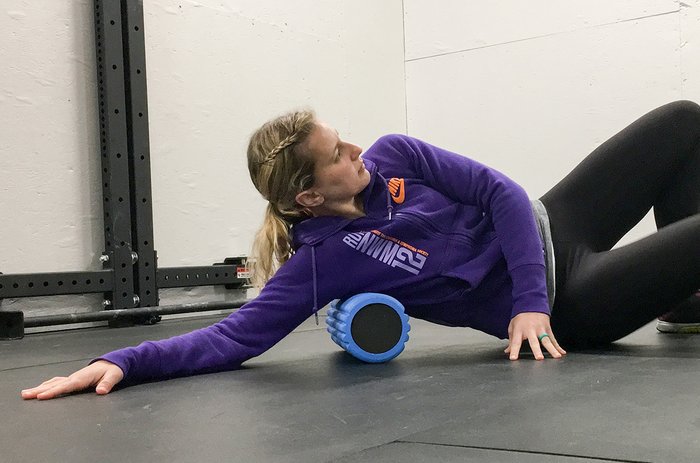
- Lie on your side, and place the roller beneath your armpit.
- Roll up and down, starting at your armpit and moving toward your outer hip. Most of the tender spots will likely be located closer to your armpit, so make sure you spend more time there.
- Spend about 90 seconds on each side.
Child's Pose Side Stretch
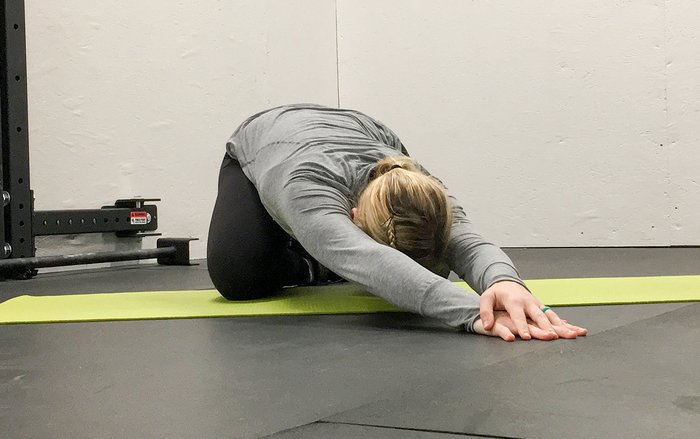
- Sit on your shins with your big toes touching and your knees wide apart.
- Walk your hands out in front to bring your torso between your thighs.
- Walk your hands over to your right side and place your left palm on top of your right hand.
- Press down through your palms as you extend your left hip back.
- Continue to lengthen your left side as you hold this position for one minute. Then, switch sides.
5. Foam Roll Upper Back and Thread the Needle
Foam rolling your upper back requires a little more movement to reap the benefits. After rolling your upper back, it's time to twist. Thread the needle is a great way to utilize both your own leverage and gravity to release the tension in your upper back.
Foam Roll Upper Back
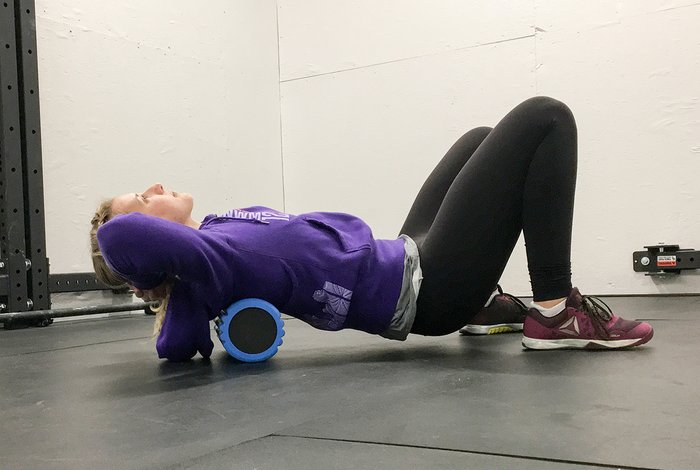
- Place the foam roller horizontally across your mid back.
- Bring your hands behind your head with your elbows out wide.
- Place your feet on the floor, and begin to roll up and down your upper back.
- As you roll, extend and round your upper back. This will help knots come to the surface, and you might also feel some cracking or popping along your spine.
- Spend at least one minute here, if not longer.
Thread the Needle
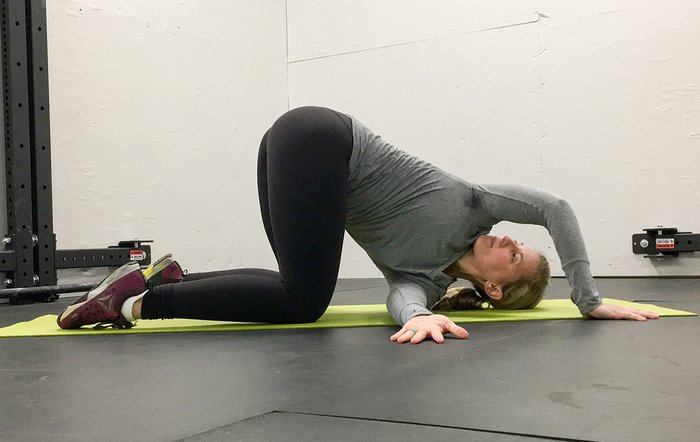
- Start on your hands and knees.
- Thread your right arm through to the left and come down onto your right shoulder.
- Move your left hand under your left elbow.
- Push down into your left hand for added leverage.
- Hold this position for one minute, then switch sides.
6. Foam Roll Quads and Twisted Monkey
The complimentary pose to foam rolling your quads is what is known as "twisted monkey." This is a challenging pose for many athletes. If you need help, use a band, strap, or belt to assist.
Foam Roll Quads/Hip Flexors
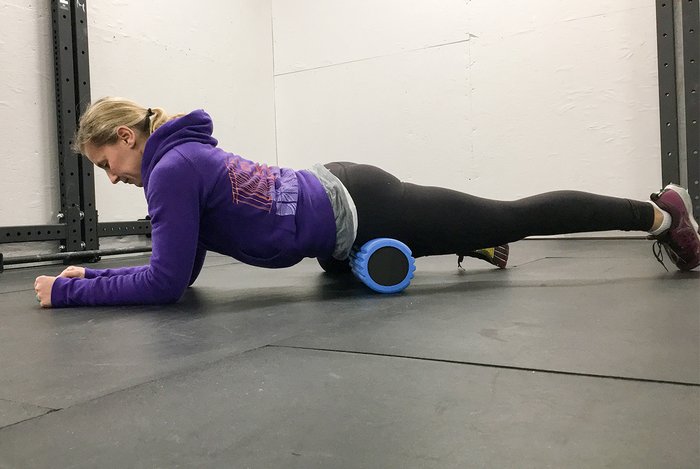
- Start on your hands and knees, then place the center of your thigh on top of the foam roller.
- Drop to your forearms, and roll from your hip crease all the way down to right above your knee. The weight of your body will provide enough leverage to target the tender spots along the top of your thigh, as well as your inner and outer thigh.
- Spend about one minute on each side.
Twisted Monkey
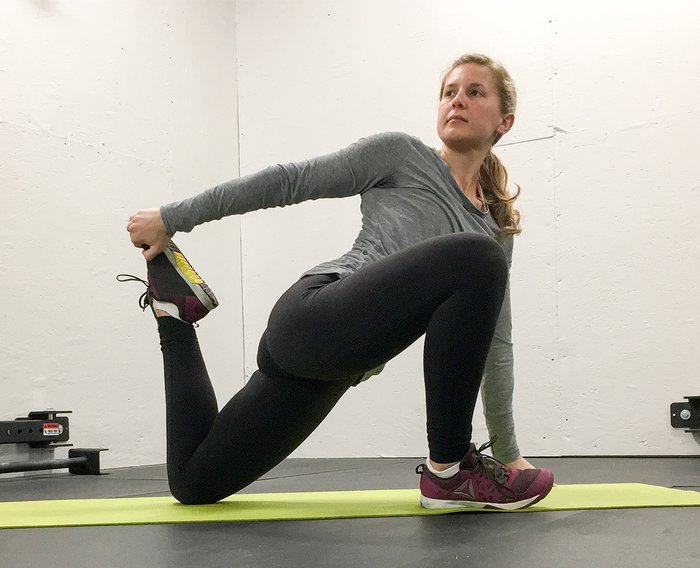
- From your hands and knees, step your right foot to the outside of your right hand.
- Drop your hips down toward the floor as you let your right knee fall away from your torso.
- Bend your back knee, and grab your foot with your right hand. Gently draw your left heel close to you. If your right hamstring cramps—which is normal—or you can't grab your back foot at all, wrap a strap around your right ankle and hold the strap over your right shoulder.
- Once you get into position, hold this pose for 90 seconds on each side.

